19 de diciembre de 2021

SQLite basic commands

Start SQLite from cosole:
$ sqlite3
sqlite>

sqlite>.help
output all comands

sqlite>.open database_name.db
open or cretae database.

sqlite>.tables
show tables of active database.

sqlite>.schema table_name    show SQL create table fields command.


To show 20 rows of table_name with MySQL look:

    sqlite>.header on

    sqlite>.mode column

    sqlite>SELECT * FROM table_name LIMIT 20;


Describe table in MySQL look:

    sqlite> pragma table_info('table_name');

Tables like MySQL
    sqlite>.mode table

30 de octubre de 2021

How to measure Temperature and Humidity from two DHT22 sensors conected to Raspberry-Pi and Python3

For this project I used 2 DHT22 sensors modules that include the resistor.

Sensor has 3 wires to connect to GPio: Data, GND and VCC (+5V or 3.3V).

Can be use 5V or 3.3V to provide power to sensor.

With 3.3V sometimes DHT22 sensor did no respond or lost the connection (?), in my case using 5V solve the problem.

Script are coded in Python3, let's install previously the libraries. 


   1) The Python script:

#!/usr/bin/python3
####################################################
# (C)by MisNotasLinux 2021
# DHT22_01: data wire to gpio 23

# DHT22_02: data wire to gpio 24
# Conect VCC of
DHTs to 5V or 3.3V rpi gpio pin.
# Conect GND of DHTs to GND rpi gpio pin.
####################################################

import Adafruit_DHT
import time
import datetime

DHT_SENSOR = Adafruit_DHT.DHT22
DHT_01 = 23   # data rpi gpio pin for dht sensor 01
DHT_02 = 24   #
data rpi gpio pin for dht sensor 02

t = 10    # time for repeat measurement

while True:
    print(datetime.datetime.now())
    print("----------------------------------------------")

    h01, t01 = Adafruit_DHT.read_retry(DHT_SENSOR, DHT_01)

    if h01 is not None and t01 is not None:
        print("Temp_01={0:0.1f}*C  Humidity_01={1:0.1f}%".format(t01, h01))
    else:
        print("Failed to retrieve data from humidity sensor 01")

    h02, t02 = Adafruit_DHT.read_retry(DHT_SENSOR, DHT_02)

    if h02 is not None and t02 is not None:
        print("Temp_02={0:0.1f}*C  Humidity_02={1:0.1f}%".format(t02, h02))
    else:
        print("Failed to retrieve data from humidity sensor 02")

    print("Sleeping " + str(t) + " sec ...")
    print("----------------------------------------------")


   2) References:

https://github.com/adafruit/Adafruit_Python_DHT

19 de octubre de 2021

Cambiar el Sistema Operativo por defecto al arranque en Linux Mint 20


En Linux Mint 20 instalado con multi SO boot con Windows no aparece /etc/default/grub (????)

http://misnotaslinux.blogspot.com/2020/06/linux-mint-193-tricia-y-window10-con.html

De modo que no puedo aplicar la solución indicada en:

http://misnotaslinux.blogspot.com/2010/10/menulst-de-grub2.html

tampoco me permite cambiar el sistema operativo por edefecto usando BootReapair (???)

http://misnotaslinux.blogspot.com/2012/06/arreglar-el-mbr-con-boot-repair.html

 -

Finalmente he podido cambiar el sistema operativo que arraca por defecto al iniciar el ordenador con grub2 del siguiente modo:

# grub-set-default 0
# update-grub 

Siendo "0" el primer sistema operativo que aparece en el menu de arranque de grub2.

Ref.: https://askubuntu.com/questions/148662/how-to-get-grub2-to-remember-last-choice


17 de octubre de 2021

How to install Grafana in Rpi

https://grafana.com/


Protocol:

1)  Detect my RPi CPU:

    $ cat /proc/cpuinfo
        processor    : 0
        model name    : ARMv6-compatible processor rev 7 (v6l)
        BogoMIPS    : 697.95
38.40
        ..

         So my RPi B+ ARMv6 cpu.

2) Download Grafana for ARMv6

from https://grafana.com/grafana/download?platform=arm

Choose the version corresponding with the cpu, copy and execute commans in your RPi console.

Ubuntu and Debian(ARMv6)

    $ sudo apt-get install -y adduser libfontconfig1
    $ wget https://dl.grafana.com/oss/release/grafana_7.3.6_armhf.deb
    $ sudo dpkg -i grafana_7.3.6_armhf.deb

     ...

    ### NOT starting on installation, please execute the following         statements to configure grafana to start automatically using         systemd

     sudo /bin/systemctl daemon-reload
     sudo /bin/systemctl enable grafana-server

    ### You can start grafana-server by executing
     sudo /bin/systemctl start grafana-server

Execute the indicated command if you want start Grafana at boot.  


3) Start Grafana server:

    $ sudo service grafana-server start
 

4) Web Access to Grafana:

Using web browser in address [Grafana host IP]:3000


5) First login to Grafana:

Default user: admin
Default password: admin

Change your password and enter into Grafana:


7) Create new source of data from MariaDB

If you have your database in different host, allow remote access in database server: http://misnotaslinux.blogspot.com/2021/10/allow-access-to-mysqlmariadb-from.html

Add new data source:


Select MySQL:


Fulfill database access data:


... Save&Test


8) Make a Grafana panel


 Start to design graph, tables, etc.


Links:

https://andreea-sonda31.medium.com/monitor-raspberry-pi-resources-and-parameters-with-grafana-board-part-1-ab0567303e8

https://websiteforstudents.com/allow-remote-access-to-mariadb-database-server-on-ubuntu-18-04/

How to Backup and Restore MariaDB/MySQL databses


This is a clear tutorial about:

https://phoenixnap.com/kb/how-to-backup-restore-a-mysql-database


En resumen:

Backup:

sudo mysqldump -u [user] -p [database_name] > [filename].sql


Restore:

mysql -u root -e "CREATE DATABASE database_name"

mysql -u [user] -p [database_name] < [filename].sql

16 de octubre de 2021

Allow access to MySQL/MariaDB from remote hosts

Edit mariadb.conf:

# nano /etc/mysql/mariadb.conf.d/50-server.cnf

    change:    bind-address = 127.0.0.1

    for:           bind-address = 0.0.0.0

# service mariadb restart


This allow access from all universe IPs, it can dangerous, is better limit access to localnet.

For example:

                bind-address = 192.168.1.0  


Grant access from remote host:

    with all privileges:

            GRANT ALL ON database_name.* TO 'database_user@localhost' IDENTIFIED BY                     'database_user_password';

    Only read data (select): 
            GRANT SELECT ON *.* TO 'user'@'localhost' IDENTIFIED BY 'password';
    and
    FLUSH PRIVILEGES;


7 de julio de 2021

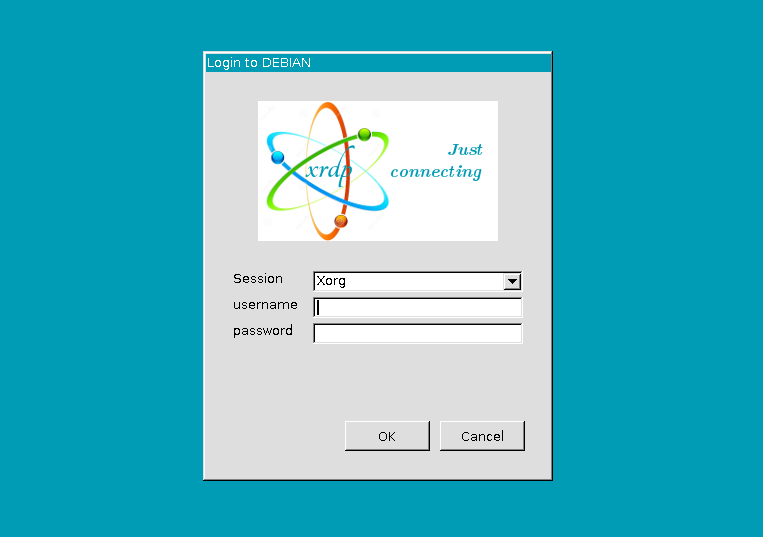
Install xrdp in Linux Mint 20

Protocol:

  1. sudo apt-get install xrdp
  2. sudo sed -i.bak '/fi/a #xrdp multiple users configuration \n mate-session \n' /etc/xrdp/startwm.sh
  3. sudo adduser xrdp ssl-cert
  4. sudo /etc/init.d/xrdp restart

 Ok, now you can access by Remote Desktop Connection tool from windows computer over net.


Bibliography:
https://www.e2enetworks.com/help/knowledge-base/how-to-install-remote-desktop-xrdp-on-ubuntu-18-04

28 de abril de 2021

Simple Bash Text Color

#!/bin/bash

echo -e "\e[31mRed"

echo -e "\e[32mGreen"

echo -e  "\e[33mYellow"

echo -e  "\e[34mBlue"

echo -e "\e[35mMagenta"

echo -e "\e[36mCyan"

echo -e "\e[39mDefault"

exit 0


Una forma un poco mas humanizada de colorear el texto en bash:

#!/bin/bash

# colors ############
R='\e[31m' # Red
G='\e[32m' # Green
B='\e[34m' # Blue
Y='\e[33m' # Yellow
M='\e[35m' # Magenta
C='\e[36m' # Cyan
D='\e[39m' # Default
#####################

echo -e $R'Mis '$G'Notas '$B'L'$Y'i'$M'n'$C'u'$D'x'

exit 0


Free VPN: ProtonVPN en linux

Probando la opcion gratuita de ProtonVPN.


1) Registrarse en ProtonVPN.

https://account.protonvpn.com/signup/account


2) Instalacion en linux mint

https://protonvpn.com/support/linux-vpn-setup/

  # aptitude install openvpn

  # aptitude install network-manager-openvpn-gnome


Option B: VPN setup for Linux using the Terminal (CLI)


# sudo wget "https://raw.githubusercontent.com/ProtonVPN/scripts/master/update-resolv-conf.sh" -O "/etc/openvpn/update-resolv-conf"

# chmod +x "/etc/openvpn/update-resolv-conf"


Download desde tu web de ProtonVPN el fichero de configuracion de un servidor vpn: por ejemplo este de Japón:

jp-free-01.protonvpn.com.tcp.ovpn


# openvpn jp-free-01.protonvpn.com.tcp.ovpn
Enter Auth Username:
Enter Auth Password:

Este usuario y passwor esta en tu cuenta ProtonVPN en

https://account.protonvpn.com/account

en Nombre de usuario de OpenVPN / IKEv2

...
...
Tue Apr 27 23:56:36 2021 Initialization Sequence Completed

Ok estas conectado a la vpn !!!

Verifica tu ip:en https://ipleak.net/

Ok, esta IP no parece que sea de movistar !!!

Para deconectarte control+c en la consola linux.


Links:

Not free but cheap: https://airvpn.org/

https://protonvpn.com/support/linux-vpn-setup/